
Why You’ll Love This Homemade Vanilla Bean Puree
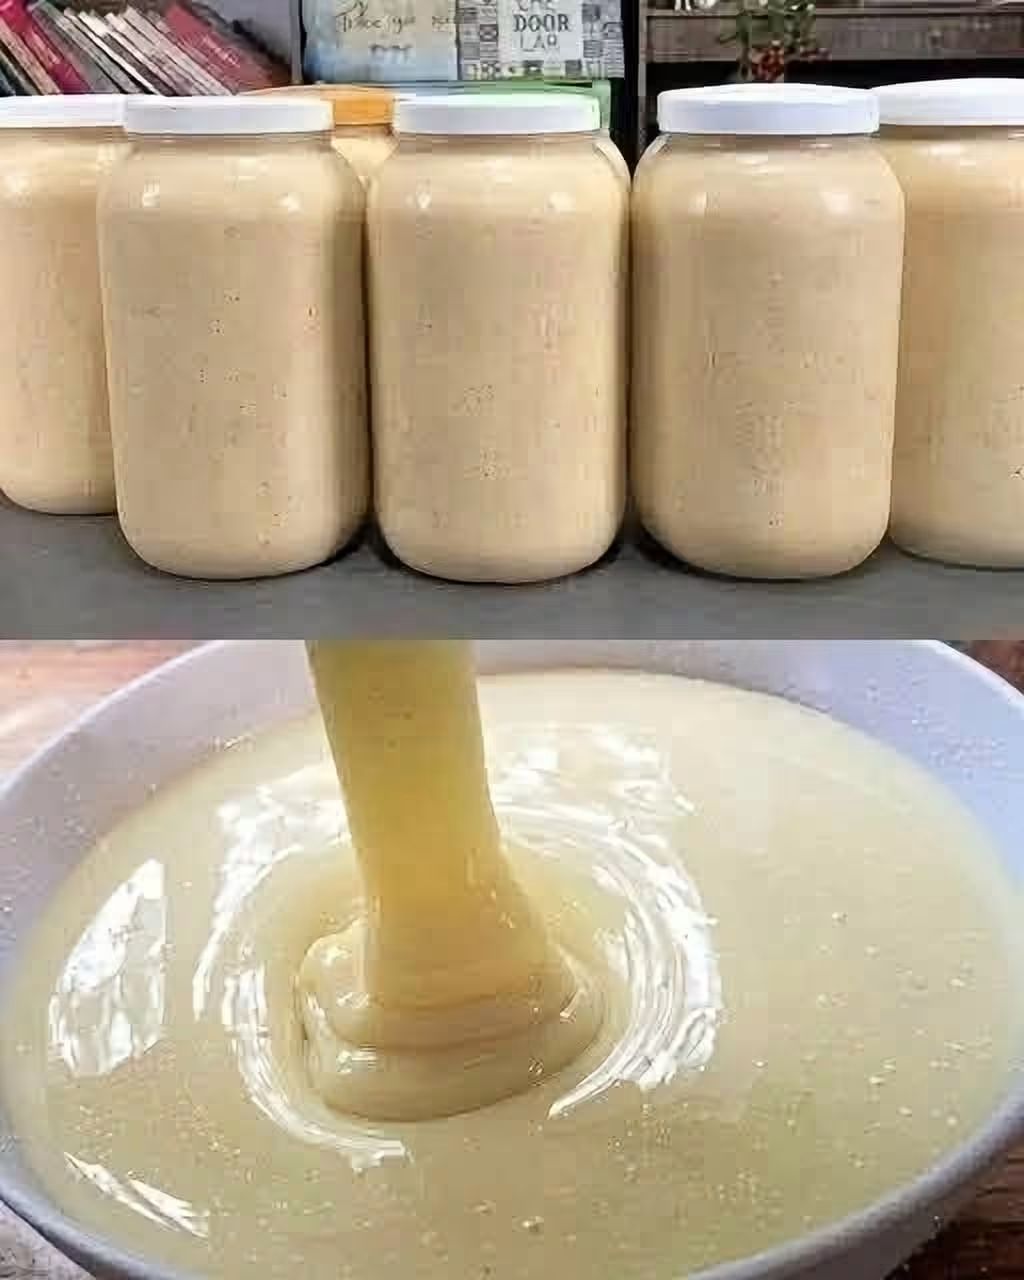
Imagine a velvety smooth, subtly sweet, and wonderfully aromatic creamy puree that can elevate almost any dish. This homemade vanilla bean puree is exactly that! It’s incredibly versatile, perfect for stirring into your morning coffee, drizzling over pancakes, or even as a base for luxurious dessert fillings. Unlike store-bought options, making it yourself allows you to control the quality of ingredients and achieve that perfect pale yellow, viscous texture you see in the image.
This recipe is designed for ease and maximum flavor. You’ll love how simple it is to prepare, and the result is a gourmet-quality ingredient that will make your culinary creations shine. Plus, it’s a fantastic way to utilize those precious vanilla beans, ensuring every speck of their exquisite flavor is captured. If you’re looking for a way to add a touch of elegance and incredible taste to your cooking and baking, this creamy vanilla puree is your answer.
The Magic of Vanilla Beans
Vanilla beans are the star of this creamy puree, providing a complex, floral, and sweet aroma that is truly unparalleled. While vanilla extract is common, using actual vanilla beans, especially in a puree, delivers a depth of flavor that extract simply can’t match. The tiny black specks visible in the finished product are a hallmark of authentic vanilla bean goodness, indicating a high-quality ingredient. Learning how to properly prepare and utilize vanilla beans is a valuable skill for any home cook or baker.
Ingredients for Creamy Vanilla Bean Puree
- 1 cup (240ml) heavy cream
- 1/2 cup (120ml) whole milk
- 1/4 cup (50g) granulated sugar
- 2 vanilla beans, split lengthwise and scraped
- 1 tablespoon cornstarch or arrowroot powder
- 2 tablespoons cold water
- Pinch of salt
Ingredient Notes
- Heavy Cream and Whole Milk: The combination of heavy cream and whole milk creates the perfect balance of richness and smooth consistency. You can experiment with different milk fat percentages, but for that luscious, pourable texture, full-fat dairy is recommended.
- Vanilla Beans: Quality matters here! Look for plump, moist vanilla beans. Madagascar vanilla beans are a popular choice for their classic, sweet flavor, but Tahitian or Mexican varieties can also offer unique aromatic profiles. Don’t discard the scraped pods; they can be added to the mixture while simmering to infuse even more flavor, then removed before blending.
- Sugar: Granulated sugar provides sweetness without altering the color or texture. Adjust the amount to your preference. For a richer, deeper flavor, you could consider using a touch of brown sugar or maple syrup, though this will slightly change the color.
- Cornstarch/Arrowroot Powder: These act as thickening agents, giving the puree its beautiful viscous quality. Ensure you mix them thoroughly with cold water before adding to prevent lumps.
How to Make Creamy Vanilla Bean Puree
- Prepare Vanilla Beans: Using a sharp paring knife, split the vanilla beans lengthwise down the middle. Use the back of the knife to scrape out the tiny, fragrant seeds. Set the seeds aside and keep the pods if you wish to infuse more flavor.
- Combine Dairy and Sugar: In a medium saucepan, combine the heavy cream, whole milk, granulated sugar, and a pinch of salt. Add the scraped vanilla bean seeds and the empty pods (if using) to the saucepan.
- Gently Heat: Heat the mixture over medium-low heat, stirring occasionally, until the sugar is fully dissolved and small bubbles begin to form around the edges. Do not bring to a rolling boil.
- Thicken the Puree: In a small bowl, whisk together the cornstarch or arrowroot powder with the cold water until a smooth slurry forms. Slowly pour the slurry into the simmering cream mixture while continuously whisking. Continue to whisk gently for 2-3 minutes until the puree thickens to a smooth, pourable consistency, similar to a thin pudding.
- Remove Pods and Cool: Remove the vanilla bean pods from the mixture. Take the saucepan off the heat. Allow the puree to cool slightly at room temperature, stirring occasionally to prevent a skin from forming.
- Store: Once cooled, pour the creamy vanilla bean puree into clean glass jars with tight-fitting lids. The puree will continue to thicken as it cools completely in the refrigerator.
Helpful Cooking Tips
- Low and Slow: When heating the cream mixture, always keep the heat on medium-low. High heat can cause the cream to scorch or separate, affecting the final texture and flavor.
- Whisk Constantly: When adding the cornstarch slurry, whisk continuously to ensure a smooth, lump-free puree. This is key to achieving that desirable glossy texture.
- Taste and Adjust: Always taste your puree before storing it. Adjust the sweetness if needed. You can also add a tiny dash of pure vanilla extract at the end for an extra vanilla boost, though the beans provide plenty of flavor.
- Sterilize Jars: If you plan to store the puree for an extended period, ensure your glass jars are sterilized to maintain freshness and prevent spoilage.
Ingredient Substitutions
- Dairy-Free Option: For a dairy-free creamy puree, substitute heavy cream with full-fat coconut milk or cashew cream, and whole milk with a neutral-flavored plant-based milk like almond or oat milk. The texture might vary slightly, but the vanilla flavor will still shine.
- Sweetener Alternatives: Instead of granulated sugar, you can use maple syrup, agave nectar, or a sugar substitute. Adjust quantities to achieve your desired sweetness. Keep in mind that liquid sweeteners might slightly alter the consistency.
- Thickener: If you don’t have cornstarch or arrowroot powder, tapioca starch can be used as a substitute, following similar mixing instructions.
Variations
- Spiced Vanilla Puree: Add a pinch of cinnamon, nutmeg, or cardamom to the cream mixture while simmering for a warm, spiced variation perfect for fall desserts.
- Citrus Vanilla Puree: Infuse the cream with a strip of orange or lemon zest during the simmering stage. Remove the zest before thickening for a bright, aromatic twist.
- Coffee Vanilla Puree: Stir in a teaspoon of instant espresso powder with the sugar for a delightful coffee-vanilla blend, excellent for lattes or tiramisu.
Serving Suggestions
This creamy vanilla bean puree is incredibly versatile! Here are a few ideas:
- Dessert Topping: Drizzle it warm over ice cream, fruit tarts, cheesecake, or apple pie.
- Beverage Enhancer: Stir a spoonful into your coffee, tea, hot chocolate, or milkshakes for a gourmet touch.
- Breakfast Treat: Swirl it into oatmeal, yogurt, or use it as a decadent topping for pancakes, waffles, or French toast.
- Baking Ingredient: Incorporate it into cake batters, muffin mixes, or as a filling for pastries and crepes.
- Sauce Base: Use it as a base for crème anglaise, custards, or even a light dessert sauce.
Storage and Reheating
Store the homemade creamy vanilla bean puree in airtight glass jars in the refrigerator for up to 1-2 weeks. Ensure the jars are completely clean and sealed properly to maintain freshness. The puree will thicken considerably when chilled. To use, simply scoop out the desired amount.
If you prefer a warmer, more pourable consistency, gently reheat the puree over low heat on the stovetop, stirring constantly. You can also microwave it in short bursts, stirring in between, until it reaches your desired temperature and consistency. If it’s too thick after chilling, you can whisk in a tiny bit of milk or cream while reheating to thin it out.
Frequently Asked Questions
Can I use vanilla extract instead of vanilla beans?
While you can use vanilla extract, the flavor will not be as rich or complex as with fresh vanilla beans. If substituting, use about 1-2 teaspoons of high-quality vanilla extract, adding it after the puree has thickened and been removed from the heat to preserve its flavor.
Why did my puree turn lumpy?
Lumps usually occur if the cornstarch slurry wasn’t mixed thoroughly with cold water before adding, or if it was added too quickly to a hot liquid without constant whisking. Ensure your slurry is smooth and add it slowly while whisking vigorously.
Can I freeze this vanilla bean puree?
Freezing dairy-based purees can sometimes affect the texture upon thawing, making it slightly grainy. While technically possible, it’s best enjoyed fresh from the refrigerator. If you do freeze it, thaw it slowly in the refrigerator and whisk vigorously to restore some of its creaminess.
How can I make this puree thicker or thinner?
To make it thicker, you can add a bit more cornstarch slurry (pre-mixed with cold water) and gently simmer until the desired consistency is reached. To thin it out, simply whisk in a tablespoon or two of milk or cream until it reaches your preferred consistency.
Final Recipe Notes
This creamy homemade vanilla bean puree is a delightful addition to any kitchen. Its rich flavor and silky texture make it a standout ingredient that will impress your family and friends. Whether you’re a seasoned baker or just starting, this recipe is straightforward and yields fantastic results. Enjoy the process of creating this luxurious puree and watch as it transforms your everyday dishes into something extraordinary!
Ingredients
- 1 cup (240ml) heavy cream
- 1/2 cup (120ml) whole milk
- 1/4 cup (50g) granulated sugar
- 2 vanilla beans, split lengthwise and scraped
- 1 tablespoon cornstarch or arrowroot powder
- 2 tablespoons cold water
- Pinch of salt
Instructions
- Prepare Vanilla Beans: Using a sharp paring knife, split the vanilla beans lengthwise down the middle. Use the back of the knife to scrape out the tiny, fragrant seeds. Set the seeds aside and keep the pods if you wish to infuse more flavor.
- Combine Dairy and Sugar: In a medium saucepan, combine the heavy cream, whole milk, granulated sugar, and a pinch of salt. Add the scraped vanilla bean seeds and the empty pods (if using) to the saucepan.
- Gently Heat: Heat the mixture over medium-low heat, stirring occasionally, until the sugar is fully dissolved and small bubbles begin to form around the edges. Do not bring to a rolling boil.
- Thicken the Puree: In a small bowl, whisk together the cornstarch or arrowroot powder with the cold water until a smooth slurry forms. Slowly pour the slurry into the simmering cream mixture while continuously whisking. Continue to whisk gently for 2-3 minutes until the puree thickens to a smooth, pourable consistency, similar to a thin pudding.
- Remove Pods and Cool: Remove the vanilla bean pods from the mixture. Take the saucepan off the heat. Allow the puree to cool slightly at room temperature, stirring occasionally to prevent a skin from forming.
- Store: Once cooled, pour the creamy vanilla bean puree into clean glass jars with tight-fitting lids. The puree will continue to thicken as it cools completely in the refrigerator.
- Prep time: 15 minutes
- Cook time: 10 minutes
- Total time: 25 minutes
- Servings: 5 jars (approx. 2 cups total)