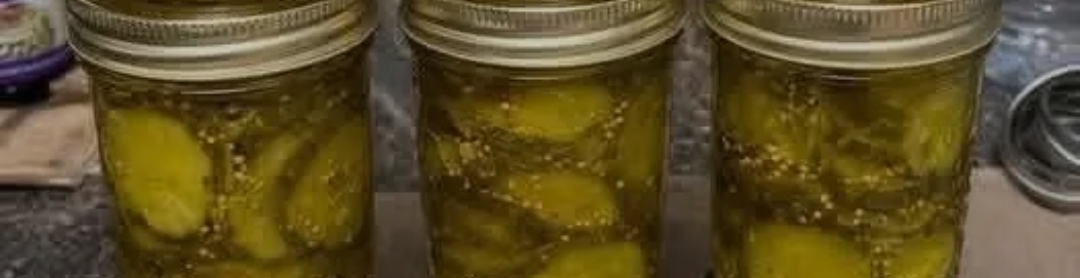
There’s something incredibly satisfying about making your own pickles, and these Old-Fashioned Bread and Butter Pickles are a true testament to that. With their signature sweet and tangy flavor profile, combined with a delightful crunch, they are a beloved classic for a reason. This recipe is straightforward, making it accessible even for beginner canners, and the results are incredibly rewarding. You’ll love having jars of these homemade bread and butter pickles ready to elevate your sandwiches, burgers, or simply to enjoy straight from the jar.Beyond their delicious taste, making your own pickles allows you to control the quality of ingredients and customize the flavors to your liking. It’s also a fantastic way to preserve an abundance of cucumbers from your garden or a local farmer’s market, ensuring you can enjoy fresh, flavorful pickles all year round. The vibrant color and inviting aroma of these pickles will make them a staple in your pantry.IngredientsCrafting delicious homemade pickles starts with fresh, quality ingredients. Here’s what you’ll need for these Old-Fashioned Bread and Butter Pickles:Pickling Cucumbers: The star of the show! Use firm, fresh pickling cucumbers for the best texture.Onion: A large onion, thinly sliced, adds a subtle savory note and aromatic depth.White Vinegar: Provides the classic tangy base for our brine.Apple Cider Vinegar: Adds a slightly fruity, mellow acidity that complements the sweetness.Granulated Sugar: Essential for the characteristic sweet flavor of bread and butter pickles.Kosher Salt: Used for brining and seasoning. Ensure it’s kosher or pickling salt, as iodized salt can cloud your brine.Mustard Seeds: A classic pickling spice, adding a pungent, earthy flavor.Celery Seeds: Contributes a unique, slightly bitter, and aromatic note.Turmeric: Gives the pickles their beautiful golden color and a hint of earthy flavor.Crushed Red Pepper Flakes: Optional, but adds a subtle warmth and kick.Ingredient NotesFor the best results, always use fresh, crisp pickling cucumbers. English or Kirby cucumbers work wonderfully for this recipe. When slicing, aim for uniform thickness to ensure even pickling. Using a mandoline can greatly assist in achieving consistent slices for both cucumbers and onions. The combination of white and apple cider vinegar creates a balanced brine, but you can adjust the ratio slightly to your preference. Remember to use non-iodized salt to maintain clarity in your pickle jars.How to Make Old-Fashioned Bread and Butter PicklesMaking these pickles is a simple process, broken down into a few key steps:Prepare Cucumbers and Onions: Wash and thinly slice your pickling cucumbers and the large onion. For best results, use a mandoline for uniform slices.Brine the Vegetables: In a large bowl, combine the sliced cucumbers and onions with 1 tablespoon of kosher salt. Toss gently to coat. Let this mixture stand for at least 2 hours, or up to 4 hours, allowing the salt to draw out excess moisture. This step is crucial for crisp pickles.Rinse and Drain: After brining, thoroughly rinse the cucumber and onion mixture under cold running water to remove excess salt. Drain well and gently squeeze out any remaining liquid.Prepare the Brine: In a large non-reactive pot, combine the white vinegar, apple cider vinegar, granulated sugar, mustard seeds, celery seeds, turmeric, and crushed red pepper flakes (if using). Bring the mixture to a boil over medium-high heat, stirring until the sugar is completely dissolved. Reduce heat and simmer for 5 minutes to allow the flavors to meld.Pack the Jars: While the brine is simmering, sterilize your canning jars and lids according to manufacturer’s instructions. Tightly pack the rinsed cucumber and onion slices into the hot, sterilized jars, leaving about ½ inch of headspace.Pour in Brine: Carefully pour the hot brine over the packed vegetables, ensuring they are fully submerged. Remove any air bubbles by gently tapping the jars or using a non-metallic utensil to release trapped air. Adjust headspace if necessary.Seal and Process (Optional): Place the lids and rings on the jars, tightening to fingertip-tight. For shelf-stable pickles, process the jars in a boiling water canner for 10-15 minutes (adjusting for altitude if necessary). Alternatively, for refrigerator pickles, simply cool the jars to room temperature and then refrigerate.Cool and Store: Allow processed jars to cool undisturbed for 12-24 hours. Check seals. Any unsealed jars should be refrigerated and consumed within a few weeks. Store properly sealed jars in a cool, dark place for up to one year. Refrigerator pickles should be stored in the refrigerator and consumed within 2-3 months.Helpful Pickling TipsChoose Fresh Cucumbers: The fresher the cucumbers, the crisper your pickles will be. Look for firm, unblemished cucumbers.Uniform Slices: Consistent slicing ensures even pickling and a better texture. A mandoline is a great tool for this.Don’t Skip Brining: The initial salting step is key to drawing out water, which prevents soggy pickles and helps them absorb the flavorful brine.Sterilize Properly: If you plan to can for shelf stability, proper sterilization of jars and lids is crucial for food safety and preventing spoilage.Patience is Key: While tempting to try them immediately, allow your pickles to sit for at least a week (or even longer) for the flavors to fully develop and meld.Ingredient SubstitutionsWhile this recipe offers a classic flavor, you can make a few substitutions:Vinegar: For a milder pickle, you could use all white vinegar. For a bolder, fruitier flavor, you could increase the apple cider vinegar slightly, but always maintain a 5% acidity for safe pickling.Sugar: While granulated sugar is traditional, you could experiment with a small amount of brown sugar for a deeper, molasses-like sweetness.Spices: Feel free to adjust the spice blend. Add a pinch of whole cloves, allspice berries, or a bay leaf for additional complexity. A slice of fresh ginger can also add a delightful zing.VariationsOnce you master the basic recipe, you can explore exciting variations:Spicy Bread and Butter Pickles: Increase the amount of crushed red pepper flakes or add a few thinly sliced jalapeños to the jars for a fiery kick.Garlic Bread and Butter Pickles: Add a few peeled garlic cloves to each jar before pouring in the brine for a savory garlic infusion.Dill Bread and Butter Pickles: While not traditional, a sprig of fresh dill in each jar can add a lovely herbaceous note.Serving SuggestionsOld-Fashioned Bread and Butter Pickles are incredibly versatile. Here are some popular ways to enjoy them:Sandwiches and Burgers: Their sweet and tangy crunch perfectly complements rich meats and creamy sauces.Charcuterie Boards: A welcome acidic counterpoint to cheeses and cured meats.Side Dish: Serve alongside grilled chicken, pulled pork, or any BBQ dish.Salads: Chop them up and add them to potato salad, tuna salad, or egg salad for extra flavor and texture.Snack: Enjoy them straight from the jar as a refreshing, flavorful snack.Storage and CanningProper storage is essential to keep your homemade pickles fresh and safe. If you opted for the boiling water bath canning method, properly sealed jars can be stored in a cool, dark pantry for up to one year. Always check for a proper seal before storing; the lid should be concave and not flex when pressed. Any jars that did not seal properly should be stored in the refrigerator and consumed within 2-3 months.For refrigerator pickles (those not processed in a boiling water bath), they must be stored in the refrigerator immediately after cooling and will last for approximately 2-3 months. Always use clean utensils when removing pickles from the jar to prevent contamination.Frequently Asked QuestionsWhat kind of cucumbers are best for pickling?Small, firm pickling cucumbers (like Kirby or Gherkin varieties) are ideal. They have thinner skins and fewer seeds, resulting in a crispier pickle. English cucumbers can also work well.Why do my pickles turn soft?Soft pickles can be caused by several factors: using cucumbers that aren’t fresh, not brining them adequately, or over-processing during canning. The initial salt brine helps draw out moisture, contributing to crispness.Can I reuse the pickling brine?It’s generally not recommended to reuse pickling brine for safety and quality reasons. The acidity and flavor profile can change after the first use, potentially leading to unsafe conditions or less flavorful pickles.How long should I wait before eating the pickles?While you can technically eat them after a day or two, the flavors of bread and butter pickles develop and meld significantly after sitting for at least one to two weeks. For the best taste, allow them to cure for this period.Do I need special canning equipment?For shelf-stable pickles, a boiling water canner, canning jars, lids, and rings are necessary. If you’re making refrigerator pickles, you only need clean jars with tight-fitting lids.Final Recipe NotesThese Old-Fashioned Bread and Butter Pickles are more than just a condiment; they’re a taste of tradition and a skill that connects you to generations of home preservers. The process is rewarding, and the sweet-tangy crunch of your homemade pickles will bring a smile to your face with every bite. Experiment with the spice levels, savor the process, and enjoy the delicious results of your pickling efforts!Ingredients8 cups pickling cucumbers, thinly sliced1 large onion, thinly sliced2 cups white vinegar1 cup apple cider vinegar1½ cups granulated sugar1 tablespoon kosher salt1 teaspoon mustard seeds1 teaspoon celery seeds½ teaspoon turmeric¼ teaspoon crushed red pepper flakesInstructionsPrepare Cucumbers and Onions: Wash and thinly slice your pickling cucumbers and the large onion. For best results, use a mandoline for uniform slices.Brine the Vegetables: In a large bowl, combine the sliced cucumbers and onions with 1 tablespoon of kosher salt. Toss gently to coat. Let this mixture stand for at least 2 hours, or up to 4 hours, allowing the salt to draw out excess moisture. This step is crucial for crisp pickles.Rinse and Drain: After brining, thoroughly rinse the cucumber and onion mixture under cold running water to remove excess salt. Drain well and gently squeeze out any remaining liquid.Prepare the Brine: In a large non-reactive pot, combine the white vinegar, apple cider vinegar, granulated sugar, mustard seeds, celery seeds, turmeric, and crushed red pepper flakes (if using). Bring the mixture to a boil over medium-high heat, stirring until the sugar is completely dissolved. Reduce heat and simmer for 5 minutes to allow the flavors to meld.Pack the Jars: While the brine is simmering, sterilize your canning jars and lids according to manufacturer’s instructions. Tightly pack the rinsed cucumber and onion slices into the hot, sterilized jars, leaving about ½ inch of headspace.Pour in Brine: Carefully pour the hot brine over the packed vegetables, ensuring they are fully submerged. Remove any air bubbles by gently tapping the jars or using a non-metallic utensil to release trapped air. Adjust headspace if necessary.Seal and Process (Optional): Place the lids and rings on the jars, tightening to fingertip-tight. For shelf-stable pickles, process the jars in a boiling water canner for 10-15 minutes (adjusting for altitude if necessary). Alternatively, for refrigerator pickles, simply cool the jars to room temperature and then refrigerate.Cool and Store: Allow processed jars to cool undisturbed for 12-24 hours. Check seals. Any unsealed jars should be refrigerated and consumed within a few weeks. Store properly sealed jars in a cool, dark place for up to one year. Refrigerator pickles should be stored in the refrigerator and consumed within 2-3 months.
Old-Fashioned Bread and Butter Pickles: A Sweet and Tangy Classic