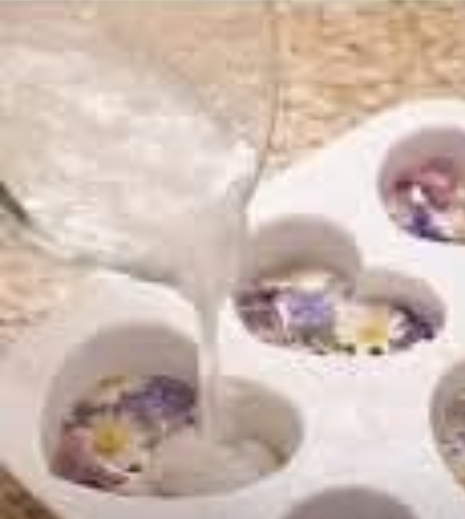
There is something wonderfully delicate about these little floral hearts. At first glance, they look like pieces of stained glass or handmade resin, with tiny flowers suspended inside a translucent surface.Order Bulk Seeds But the beautiful effect can be created with surprisingly simple craft materials. These cornstarch glass floral hearts and flowers make lovely decorations for windows, shelves, seasonal displays, handmade gifts, wreaths, garlands and keepsakes. They are especially pretty when placed where natural light can pass through them. The “glass” in the name is only a visual description. These aren’t real glass pieces. They are decorative, air-dried craft ornaments designed to create a translucent or frosted appearance. The exact recipe can vary, but a popular version uses cornstarch, baking soda and water, while other variations use cornstarch with glue. The image appears to show a similar homemade translucent floral craft. What Makes These Floral Hearts So Beautiful? The magic comes from the combination of three things: A smooth, pale base Delicate flowers or petals embedded inside Light passing through the finished piece When dried flowers are placed inside the material, their colors become the main focus. Discover more Compare Windows Try New Foods Cornstarch Small white daisies, purple flowers, pink petals and tiny leaves work especially well.Order Lab Supplies The finished pieces can have a soft, frosted quality that resembles sea glass. Unlike actual glasswork, this project doesn’t require a kiln, glass cutter or specialized equipment. That makes it a fun project for beginners. Materials You Will Need For a simple cornstarch-and-baking-soda version, gather: For the craft dough 1 cup cornstarch 1 cup baking soda About ¾ cup water For decorating Small dried flowers Small dried petals Tiny dried leaves Optional food coloring Optional glitter For shaping Silicone heart molds Silicone flower molds Small cookie cutters A small rolling pin or smooth bottle Parchment paper A drinking straw or skewer Optional finishing materials Ribbon Twine Clear craft sealer Fine sandpaper for smoothing rough edges You don’t need every item on the list.Send Flowers Discover more Corn Starch Craft Hire Designers If you’re making simple hearts that will sit on a shelf, you don’t even need ribbon or hanging holes. Important: Use Dried Flowers One of the biggest secrets to getting a beautiful result is using dry flowers. Fresh flowers contain moisture. When they’re trapped inside a drying craft material, that moisture can interfere with the drying process and may cause discoloration, soft spots or deterioration. Small dried flowers are much easier to work with. Some beautiful options include: Tiny daisies Baby’s breath Small violets Lavender Small rose petals Pressed wildflowers Tiny leaves Small dried blossoms The flowers don’t have to be perfectly preserved.Start DIY Crafts Discover more Floral Browse Art Prints Order Sweet Treats In fact, slightly imperfect petals can make each ornament look more natural. Step 1: Prepare the Cornstarch Mixture Place the cornstarch and baking soda into a saucepan. Add the water gradually while stirring. Mix until you have a smooth mixture without large lumps. At this stage, it will look more like a thick liquid than a craft dough. That’s normal. Place the saucepan over low heat. Stir continuously with a silicone spatula or wooden spoon. Don’t walk away while the mixture is heating. As the water warms, the mixture will gradually become thicker. Eventually, it should begin pulling away from the sides of the saucepan and form a soft dough-like mass. When it reaches that consistency, remove it from the heat.Buy Lumber Discover more Dessert dessert Vitamin Don’t Overcook It One common mistake is leaving the mixture on the heat for too long. Overcooking can make the dough dry, crumbly or difficult to shape. You’re looking for a soft, workable consistency. It doesn’t need to become hard in the saucepan. Step 2: Let It Cool Transfer the warm mixture onto parchment paper or another suitable work surface. Allow it to cool enough that you can handle it safely. Don’t try to knead extremely hot material. The center can remain much hotter than the outside. Once it’s comfortable to handle, gently knead it until it becomes smoother. If it feels excessively sticky, a small amount of cornstarch can help. If it feels too dry and cracks immediately, it may have been cooked too long.Order Bulk Seeds Step 3: Add Color Discover more Order Vitamins Get Rapid Tests COVID-19 If you want colorful hearts, divide the dough into several portions. You can leave some completely white. For other portions, add a very small amount of food coloring. Beautiful colors for this project include: Soft pink Lavender Pale purple Light blue Mint green Soft yellow Rose Turquoise Use small amounts. The goal is usually a soft, translucent appearance rather than an intensely colored solid. A little color can go a long way.Find Recipes Step 4: Prepare the Flowers There is something wonderfully delicate about these little floral hearts. At first glance, they look like pieces of stained glass or handmade resin, with tiny flowers suspended inside a translucent surface.Order Bulk Seeds But the beautiful effect can be created with surprisingly simple craft materials. These cornstarch glass floral hearts and flowers make lovely decorations for windows, shelves, seasonal displays, handmade gifts, wreaths, garlands and keepsakes. They are especially pretty when placed where natural light can pass through them. The “glass” in the name is only a visual description. These aren’t real glass pieces. They are decorative, air-dried craft ornaments designed to create a translucent or frosted appearance. The exact recipe can vary, but a popular version uses cornstarch, baking soda and water, while other variations use cornstarch with glue. The image appears to show a similar homemade translucent floral craft. What Makes These Floral Hearts So Beautiful? The magic comes from the combination of three things: A smooth, pale base Delicate flowers or petals embedded inside Light passing through the finished piece When dried flowers are placed inside the material, their colors become the main focus. Discover more Compare Windows Try New Foods Cornstarch Small white daisies, purple flowers, pink petals and tiny leaves work especially well.Order Lab Supplies The finished pieces can have a soft, frosted quality that resembles sea glass. Unlike actual glasswork, this project doesn’t require a kiln, glass cutter or specialized equipment. That makes it a fun project for beginners. Materials You Will Need For a simple cornstarch-and-baking-soda version, gather: For the craft dough 1 cup cornstarch 1 cup baking soda About ¾ cup water For decorating Small dried flowers Small dried petals Tiny dried leaves Optional food coloring Optional glitter For shaping Silicone heart molds Silicone flower molds Small cookie cutters A small rolling pin or smooth bottle Parchment paper A drinking straw or skewer Optional finishing materials Ribbon Twine Clear craft sealer Fine sandpaper for smoothing rough edges You don’t need every item on the list.Send Flowers Discover more Corn Starch Craft Hire Designers If you’re making simple hearts that will sit on a shelf, you don’t even need ribbon or hanging holes. Important: Use Dried Flowers One of the biggest secrets to getting a beautiful result is using dry flowers. Fresh flowers contain moisture. When they’re trapped inside a drying craft material, that moisture can interfere with the drying process and may cause discoloration, soft spots or deterioration. Small dried flowers are much easier to work with. Some beautiful options include: Tiny daisies Baby’s breath Small violets Lavender Small rose petals Pressed wildflowers Tiny leaves Small dried blossoms The flowers don’t have to be perfectly preserved.Start DIY Crafts Discover more Floral Browse Art Prints Order Sweet Treats In fact, slightly imperfect petals can make each ornament look more natural. Step 1: Prepare the Cornstarch Mixture Place the cornstarch and baking soda into a saucepan. Add the water gradually while stirring. Mix until you have a smooth mixture without large lumps. At this stage, it will look more like a thick liquid than a craft dough. That’s normal. Place the saucepan over low heat. Stir continuously with a silicone spatula or wooden spoon. Don’t walk away while the mixture is heating. As the water warms, the mixture will gradually become thicker. Eventually, it should begin pulling away from the sides of the saucepan and form a soft dough-like mass. When it reaches that consistency, remove it from the heat.Buy Lumber Discover more Dessert dessert Vitamin Don’t Overcook It One common mistake is leaving the mixture on the heat for too long. Overcooking can make the dough dry, crumbly or difficult to shape. You’re looking for a soft, workable consistency. It doesn’t need to become hard in the saucepan. Step 2: Let It Cool Transfer the warm mixture onto parchment paper or another suitable work surface. Allow it to cool enough that you can handle it safely. Don’t try to knead extremely hot material. The center can remain much hotter than the outside. Once it’s comfortable to handle, gently knead it until it becomes smoother. If it feels excessively sticky, a small amount of cornstarch can help. If it feels too dry and cracks immediately, it may have been cooked too long.Order Bulk Seeds Step 3: Add Color Discover more Order Vitamins Get Rapid Tests COVID-19 If you want colorful hearts, divide the dough into several portions. You can leave some completely white. For other portions, add a very small amount of food coloring. Beautiful colors for this project include: Soft pink Lavender Pale purple Light blue Mint green Soft yellow Rose Turquoise Use small amounts. The goal is usually a soft, translucent appearance rather than an intensely colored solid. A little color can go a long way.Find Recipes Step 4: Prepare the Flowers Cornstarch Glass Floral Hearts & Flowers: The Stunning DIY Craft That Looks Like Stained Glass Discover more Identify Plants flowers Flowers Before putting anything into the molds, arrange your flowers.Order Lab Supplies This is one of the most enjoyable parts of the project. You can create different patterns. For example, place one larger flower in the center of a heart and surround it with tiny petals. Or create a scattered wildflower effect. You can also combine: White flowers with purple petals Pink flowers with green leaves Lavender with tiny white blossoms Several different colors for a garden effect Try not to overcrowd the design. Leaving some empty space makes the finished piece look more like translucent glass. Step 5: Fill the Mold Place the silicone heart or flower mold on a flat surface. Take a small portion of the cooled dough and gently press it into the mold.Identify Plants Try to maintain an even thickness. Discover more Find Recipes Learn DIY Skills Browse Art Prints You don’t want one side of the heart to be much thicker than the other. Press the material gently into the corners and edges. If you’re using flowers inside the ornament, position them carefully. Avoid pressing delicate flowers too aggressively because their petals can break. Smooth the surface with your fingers or a small spatula. Step 6: Arrange the Flowers Now comes the creative part. Place the dried flowers where you want them. You can position them: Flat against the surface Slightly embedded In the center Around the edges In a layered arrangement For a heart, a small flower positioned slightly off-center can look particularly attractive.Start DIY Crafts For a flower-shaped ornament, you can place a contrasting flower in the center. Don’t worry about making every piece identical. The slight differences are what make handmade decorations charming. Step 7: Create a Hanging Hole If you want to hang your finished hearts, make a hole while the material is still soft. A drinking straw works very well for larger holes. Discover more Send Flowers Study Chemistry Buy Lumber A skewer or toothpick can create a smaller hole. Position the hole near the top of the heart, but don’t put it too close to the edge. If it’s too close to the edge, the ornament may crack around the hole when you add the ribbon. For small ornaments, a hole roughly the size of the ribbon or twine you’re using is sufficient. Step 8: Let Everything Dry Completely This is where patience becomes important.Compare Windows Place the molds or finished pieces somewhere: Dry Clean Well ventilated Away from direct moisture Away from children and pets while drying Depending on thickness, humidity and the particular recipe, drying may take 24 to 48 hours or longer. Thicker pieces can take considerably longer. Discover more Craft dessert Order Sweet Treats Don’t remove the ornaments simply because the surface feels dry. The inside may still contain moisture. If you remove them too early, they can bend, break or lose their shape. Step 9: Turn Them Over if Necessary If the pieces are drying on a flat surface, gently turn them after they’ve become firm enough to handle. This can help moisture escape more evenly from both sides.Get Writing Tools Be careful with delicate flowers. If a piece still feels soft, wait longer before attempting to move it. Trying to flip a soft ornament too early is one of the easiest ways to ruin it. Step 10: Smooth the Edges Cornstarch Glass Floral Hearts & Flowers: The Stunning DIY Craft That Looks Like Stained Glass Discover more Study Chemistry Order Lab Supplies Identify Plants Once the ornaments are completely dry, inspect the edges.Try New Foods You may find a few rough areas. For a smoother finish, very fine sandpaper can be used gently on completely dry edges. Don’t aggressively sand the surface where the flowers are embedded. The goal is simply to remove rough projections. Wipe away any dust afterward. Step 11: Add a Protective Finish A suitable clear craft sealer can be used if you want additional protection. Apply a thin layer rather than soaking the ornament. Allow it to dry completely according to the product instructions. A clear finish can sometimes make the ornament appear more polished and can provide some protection against humidity. However, remember that these are decorative craft pieces. They aren’t waterproof glass.Order Lab Supplies Avoid placing them somewhere they will regularly get wet. Step 12: Add Ribbon Once everything is completely dry, thread ribbon or twine through the hole. Soft ribbon works beautifully for hearts. For a rustic look, use natural twine. For a more delicate appearance, try thin satin ribbon. You can also use different ribbon colors to match the flowers inside. Beautiful Ways to Display Your Floral Hearts Discover more flower Compare Windows crafts These little decorations don’t have to hang from a Christmas tree. There are many ways to use them. Window Decorations This is probably one of the prettiest options.Send Flowers Hang several hearts near a sunny window. When light passes through the translucent material, the flowers become more visible and the colors can appear softer. Use different sizes for a layered display. Decorative Garland Make several hearts and flowers. Thread them along a length of ribbon or twine. Alternate: Hearts Flowers Leaves Different colors The result can make a beautiful seasonal garland. Discover more Craft Order Bulk Seeds Corn Starch Gift Decorations Instead of using a traditional gift tag, attach a handmade floral heart to a present. The recipient can keep the ornament after opening the gift.Identify Plants It turns the wrapping into part of the present. Wedding or Celebration Decorations These can also work as handmade decorations for special occasions. Choose flowers and colors that match the event. Small hearts can be used as table decorations or keepsakes. Memory Keepsakes A particularly meaningful idea is using a few dried flowers from a bouquet. For example, flowers from a birthday, anniversary or special occasion can potentially become decorative keepsakes. The flowers become part of something that can be kept for years. How to Make Them Look More Like Stained Glass Discover more floral Floral Hire Designers If you want the strongest stained-glass effect, focus on three things. Keep the pieces relatively thin Very thick pieces tend to look more opaque.Start DIY Crafts Use pale colors Soft pinks, purples, blues and greens allow more light to pass through visually. Leave some empty space Don’t cover the entire ornament with flowers. The contrast between transparent areas and botanical details is what creates the beautiful effect. Common Problems and How to Fix Them The Ornament Cracked This can happen if the material was too dry, the piece was too thick, or it dried too quickly. Try making thinner pieces and allowing them to dry gradually. The Piece Bent It may have been removed from the mold before it was completely dry.Buy Lumber Give thicker pieces additional drying time. Discover more Find Recipes Get Writing Tools Learn DIY Skills The Flowers Turned Brown The flowers may not have been sufficiently dry before being embedded. Use completely dried flowers for future pieces. The Surface Looks Chalky That’s normal for some versions of this craft. A suitable clear finish can change the appearance, but don’t expect the result to become identical to real glass or epoxy resin. The Material Is Too Sticky It may contain too much moisture. Allow it to cool and firm up, then work in a small amount of additional cornstarch if necessary. The Dough Is Crumbling It may have been overcooked or become too dry. Don’t continue heating it.Browse Art Prints A fresh batch may be easier than trying to rescue a severely overcooked mixture. A Simpler Alternative Discover more Order Sweet Treats Dessert dessert If you don’t want to cook cornstarch and baking soda on the stove, there are other air-dry craft methods using cornstarch and PVA craft glue. These can create a different texture and appearance, so they shouldn’t be considered exactly the same recipe. For a beginner, however, the cooked cornstarch-and-baking-soda method is an inexpensive way to experiment with the technique. Important Safety Tips Although the ingredients may look like ordinary kitchen ingredients, the finished craft should be treated as a decorative object, not as something edible. Once you’ve mixed the materials together, keep the craft tools and work surfaces separate from food preparation. Don’t use the finished pieces as:Send Flowers Coasters for food Candy molds Plates Serving trays Food decorations Drinking accessories If you use craft glue or sealant, follow its label instructions and provide appropriate ventilation. Keep small dried flowers and craft materials away from very young children who may put objects in their mouths. Also remember that dried flowers can be a choking hazard for small children and pets. Make Each One Different One of the best things about this project is that there isn’t one “correct” design. You can make: Romantic hearts: Pink petals, tiny white flowers and soft lavender. Spring flowers: Yellow, white and green.Identify Plants Purple garden: Violets, lavender and tiny leaves. Minimalist: One small flower inside a mostly clear ornament. Wildflower style: Several tiny flowers scattered naturally throughout. Holiday style: Seasonal colors with a little decorative glitter. You can even experiment with stars, circles, leaves, butterflies and other shapes. Final Thoughts Cornstarch floral hearts are a beautiful example of how simple craft materials can produce surprisingly elegant results. They may look like miniature pieces of stained glass, but they’re actually lightweight decorative ornaments made from a homemade craft mixture and dried flowers. The key to getting beautiful results is patience. Use completely dry flowers, keep the material relatively even in thickness, don’t overcrowd the design, allow plenty of drying time and handle the finished pieces gently.Order Lab Supplies Most importantly, don’t worry if your first batch isn’t perfect. A slightly crooked heart, an uneven flower or a petal that isn’t perfectly centered can actually make the finished ornament more charming. After all, the appeal of handmade crafts is that every piece has its own character. With a few simple materials, some dried flowers and a little creativity, you can turn tiny pieces of nature into beautiful translucent hearts and flowers that catch the light and bring a handmade touch to your home.
The Stunning DIY Craft That Looks Like Stained Glass