
Why You’ll Love This Recipe
Learning how to can apples is a truly satisfying kitchen endeavor that brings the bounty of the harvest right into your pantry. This method allows you to enjoy the crisp, sweet flavor of apples long after their season has passed. Imagine having perfectly sliced, ready-to-use apples for your favorite apple pie, a quick apple crisp, or simply as a healthy snack straight from the jar, even in the dead of winter. Canning apples is not only a fantastic way to extend their shelf life but also a practical skill for anyone interested in food preservation and sustainable living. It’s a great option for those who buy apples in bulk or have an abundance from their own apple trees.
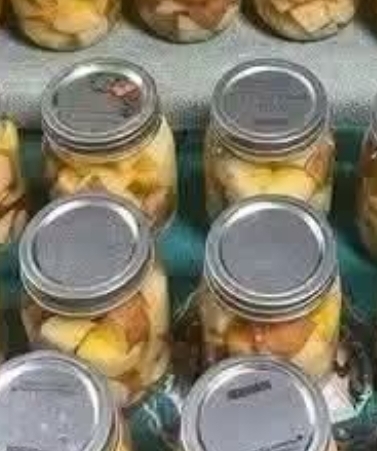
Beyond the convenience, canning your own apples ensures you know exactly what goes into your food. You control the sugar content, the type of apples, and can avoid any unwanted additives. The process, while requiring a bit of time and attention, is incredibly rewarding. The sight of dozens of glass canning jars filled with your carefully prepared fruit, sealed with metal lids, is a testament to your efforts and a beautiful addition to any food storage collection. This comprehensive guide will walk you through everything you need to know to successfully can apples, making it an accessible project for both canning beginners and seasoned home preservers.
Ingredients
The beauty of canning apples lies in its simplicity. You don’t need a long list of exotic ingredients, just good quality produce and a few pantry staples.
- Fresh Apples: Approximately 18-20 pounds for 7 quart jars, or 12-14 pounds for 9 pint jars. Choose firm, crisp varieties suitable for canning like Honeycrisp, Fuji, Gala, Granny Smith, or a mix for varied flavor.
- Water: For syrup and blanching.
- Sugar (optional): Granulated sugar for light, medium, or heavy syrup. Adjust to your preference or omit for a natural pack.
- Lemon Juice or Ascorbic Acid: To prevent browning of the apple slices.
- Canning Salt (optional): A pinch per jar to enhance flavor, but not necessary for preservation.
Ingredient Notes
- Choosing Apples: Selecting the right apples is crucial. Look for firm, unblemished fruit. A mix of sweet and tart apples can create a more complex flavor profile. Avoid overly soft or mealy varieties as they won’t hold up well during the canning process.
- Syrup Strength: The amount of sugar in your syrup is entirely up to you. A light syrup (2 cups sugar to 6 cups water) is often preferred for apples, allowing their natural sweetness to shine. A medium syrup (3 cups sugar to 6 cups water) provides a bit more sweetness, while a heavy syrup (4 cups sugar to 6 cups water) is for those who like their fruit very sweet. You can also pack apples in just water or apple juice for a sugar-free option.
- Preventing Browning: Apples oxidize quickly once cut, turning brown. A simple solution of water with lemon juice or a commercial ascorbic acid product (like Fruit-Fresh) will keep them looking vibrant. Prepare this solution before you start peeling and slicing.
- Canning Jars: Always use proper Mason-style canning jars with new lids and clean rings. Inspect jars for chips or cracks before use.
How to Make Canned Apples
Follow these steps carefully to ensure a safe and delicious batch of canned apples.
- Prepare Your Equipment: Sterilize your canning jars, lids, and rings. Keep jars hot in a large pot of simmering water until ready to fill. Set up your water bath canner with enough water to cover the jars by at least an inch and bring it to a simmer.
- Prepare Apples: Wash apples thoroughly. Peel, core, and slice or dice the apples into uniform pieces. Immediately place the cut apples into a large bowl of water mixed with lemon juice or ascorbic acid to prevent browning.
- Make Syrup (if using): In a large saucepan, combine water and sugar (if desired) for your chosen syrup strength. Bring to a boil, stirring until sugar dissolves. Keep hot.
- Blanch Apples (optional but recommended): For a fuller pack and to prevent floating, you can blanch the apple slices. Briefly immerse apple slices in boiling water for 1-2 minutes, then immediately transfer to an ice bath to stop cooking. Drain well.
- Pack Jars: Tightly pack the apple slices into the hot, sterilized canning jars, leaving 1/2 inch of headspace from the rim.
- Add Syrup: Ladle the hot syrup (or hot water/apple juice) over the apples, ensuring they are completely covered and maintaining the 1/2 inch headspace. Remove any air bubbles by gently running a non-metallic spatula or knife along the inside of the jar.
- Clean Rims and Seal: Wipe the rims of the jars clean with a damp cloth. Center a new, clean lid on each jar and screw on the band fingertip tight.
- Process in Water Bath Canner: Carefully place the filled jars into the simmering water bath canner, ensuring they are fully submerged. Bring the water to a rolling boil.
- Process Time: Process pint jars for 20 minutes and quart jars for 25 minutes, adjusting for altitude if necessary (refer to a reliable canning guide for altitude adjustments).
- Cool and Check Seals: Once processing time is complete, turn off the heat and let the jars sit in the canner for 5 minutes before carefully removing them to a folded towel on your counter. Let them cool undisturbed for 12-24 hours. You’ll hear the satisfying “ping” as the lids seal.
- Store: After cooling, check for proper seals (lids should be concave and not flex when pressed). Remove rings, wipe down jars, label with contents and date, and store in a cool, dark place.
Helpful Canning Tips
- Cleanliness is Key: Always work with clean hands, utensils, and surfaces to prevent contamination.
- Headspace Matters: Maintaining the correct headspace is crucial for proper sealing and preventing siphoning (liquid loss during processing).
- Don’t Rush Cooling: Allow jars to cool naturally. Forcing them to cool quickly can lead to seal failure or breakage.
- Altitude Adjustments: If you live at a high altitude, you’ll need to increase your processing time. Consult a reputable canning resource for specific adjustments.
- Jar Inspection: Before each use, inspect jars for chips, cracks, or imperfections that could compromise the seal.
Ingredient Substitutions
- Sugar Alternatives: For a sugar-free option, you can can apples in plain hot water, unsweetened apple juice, or a very light syrup made with a sugar substitute suitable for canning.
- Spices: A cinnamon stick, a few cloves, or a dash of nutmeg can be added to each jar for spiced canned apples.
- Other Fruits: While this recipe focuses on apples, the water bath canning method and syrup principles are similar for many other high-acid fruits like peaches, pears, and berries.
Variations
Once you’ve mastered the basic canned apples, consider these delicious variations:
- Spiced Apples: Add a cinnamon stick and a few whole cloves to each jar before adding syrup for a warm, aromatic flavor.
- Apple Pie Filling: Instead of plain slices, you can pre-cook apples with sugar, spices, and a thickening agent (like Clear Jel) to create a ready-to-use apple pie filling. This requires a specific recipe and processing time.
- Apple Sauce: While not sliced apples, canning homemade applesauce is another popular way to preserve apples using a water bath canner.
Serving Suggestions
Canned apples are incredibly versatile! Here are a few ways to enjoy your preserved bounty:
- Quick Desserts: Use them directly in apple pies, crumbles, crisps, or tarts.
- Breakfast Topping: Spoon them over oatmeal, yogurt, pancakes, or waffles.
- Savory Dishes: Serve alongside roasted pork or chicken for a sweet and savory contrast.
- Snack: Enjoy straight from the jar as a healthy and refreshing snack.
- Baked Goods: Incorporate into muffins, breads, or cakes for added moisture and apple flavor.
Storage and Reheating
- Storage: Properly sealed and processed canned apples can be stored in a cool, dark, dry place for up to 1 year. After opening, store any unused portions in the refrigerator and consume within a week.
- Reheating: Canned apples are typically enjoyed at room temperature or slightly warmed. If using in a pie or crisp, they will be baked as part of the recipe. For a warm side dish, gently heat them in a saucepan on the stovetop until warmed through.
Frequently Asked Questions
Q: Why did my apple slices float in the jar?
A: Floating is common with apples due to air trapped in the fruit. Blanching the apples before packing can help reduce this, as it removes some of the air. It doesn’t affect the safety or quality of the canned apples.
Q: Can I reuse canning lids?
A: No, canning lids (the flat part) are designed for single use. The sealing compound can’t guarantee a safe seal if reused. Canning rings (bands) can be reused as long as they are not bent or rusted.
Q: Do I have to add sugar to my canned apples?
A: No, sugar is not necessary for the safety of canned apples, as apples are a high-acid food. Sugar is added for flavor, texture, and color. You can pack them in water or unsweetened apple juice.
Q: How do I know if my jars are sealed properly?
A: After cooling, check the lids. They should be concave (curved inward) and not flex when pressed in the center. If a lid does not seal, refrigerate the jar and consume its contents within a few days, or reprocess with a new lid within 24 hours.
Final Recipe Notes
Canning apples is a wonderful way to connect with your food and ensure a supply of wholesome, delicious fruit throughout the year. The process of filling dozens of glass canning jars with vibrant, sliced fruit is a rewarding experience that yields a pantry full of possibilities. Whether you’re a seasoned canner or just starting out, this guide provides the foundation for successful home canning. Enjoy the fruits of your labor!
Ingredients
- 18-20 pounds fresh apples (for 7 quart jars)
- 6 cups water (for light syrup)
- 2 cups granulated sugar (for light syrup, adjust to preference)
- 1/2 cup lemon juice (or ascorbic acid solution) for anti-browning
- Pinch of canning salt (optional, per jar)
Instructions
- Sterilize canning jars, lids, and rings. Keep jars hot. Set up water bath canner and bring water to a simmer.
- Wash apples. Peel, core, and slice or dice apples. Immediately immerse cut apples in water with lemon juice to prevent browning.
- Prepare light syrup by boiling water and sugar until sugar dissolves. Keep syrup hot.
- Blanch apple slices in boiling water for 1-2 minutes, then transfer to an ice bath. Drain well.
- Tightly pack apple slices into hot, sterilized jars, leaving 1/2 inch headspace.
- Ladle hot syrup over apples, ensuring they are covered and maintaining 1/2 inch headspace. Remove air bubbles.
- Wipe jar rims clean. Center new lids and screw on bands fingertip tight.
- Carefully place jars in the simmering water bath canner, ensuring full submersion. Bring to a rolling boil.
- Process pint jars for 20 minutes and quart jars for 25 minutes (adjust for altitude).
- Turn off heat, let jars sit for 5 minutes, then remove to a towel to cool for 12-24 hours.
- Check seals. Remove rings, label jars, and store in a cool, dark place.
- Prep time: 1 hour 30 minutes
- Cook time: 30 minutes
- Total time: 2 hours 30 minutes
- Servings: 7 quart jars or 9 pint jars